If there’s one thing you always need more of when family camping its space. It only takes a few rainy days with young children in tow to really test how harmoniously you live in confined conditions. However enviously you look across the camping field at campers with the 10 person whoppers you know that in reality it wouldn’t fit in your car (unless you left the kids at home).
Many of the outdoor brands have cottoned onto the idea of providing additional space to your tent with add-ons such as porches, tunnel extensions and annexes but these are only for specific models of tents and if you have a tent that’s been knocking around for a few years you’ll have little chance of sourcing an add on. I’m lucky enough to have a 10 year old Kyham cotton tent which we love but doesn’t have any add-ons available. So how do you create more space without adding much bulk to your gear – a tarp extension.
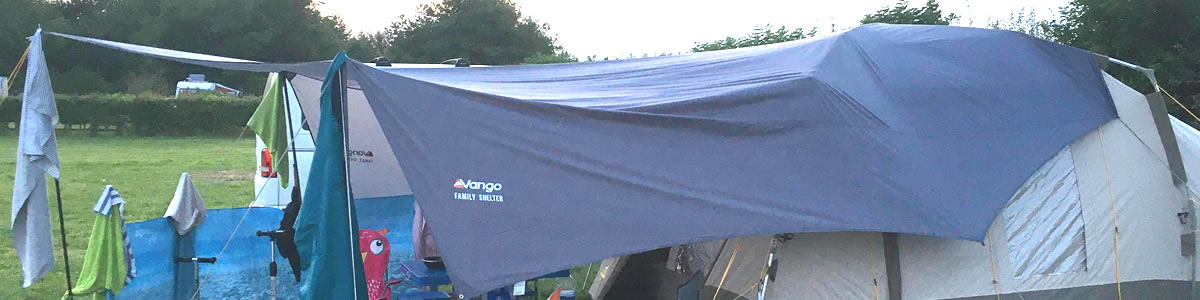
The Vango Family Shelter
The bigger brother of the Adventure Tarp which was made for backpacking tents, the Vango Family Shelter is a lightweight tarp that’s designed to fix onto the top of your tent and then stretch out in front of it to create some shelter. The most exciting thing is that it packs down into a bag that’s 63 x 13cm and looks more like a tent pole bag. At 2.85kg it’s not going to add much weight to your kit even if you have to lug it from the carpark to your pitch.
Specifications
Total Weight: 2.85kg
Pack Size: 63 x 10 x 13cm
Pitching Time: 10 mins
Waterproof Rating: 3,000mm HH
Supplied with: One King Pole & Carry Bag
RRP: £94
How Big is it?
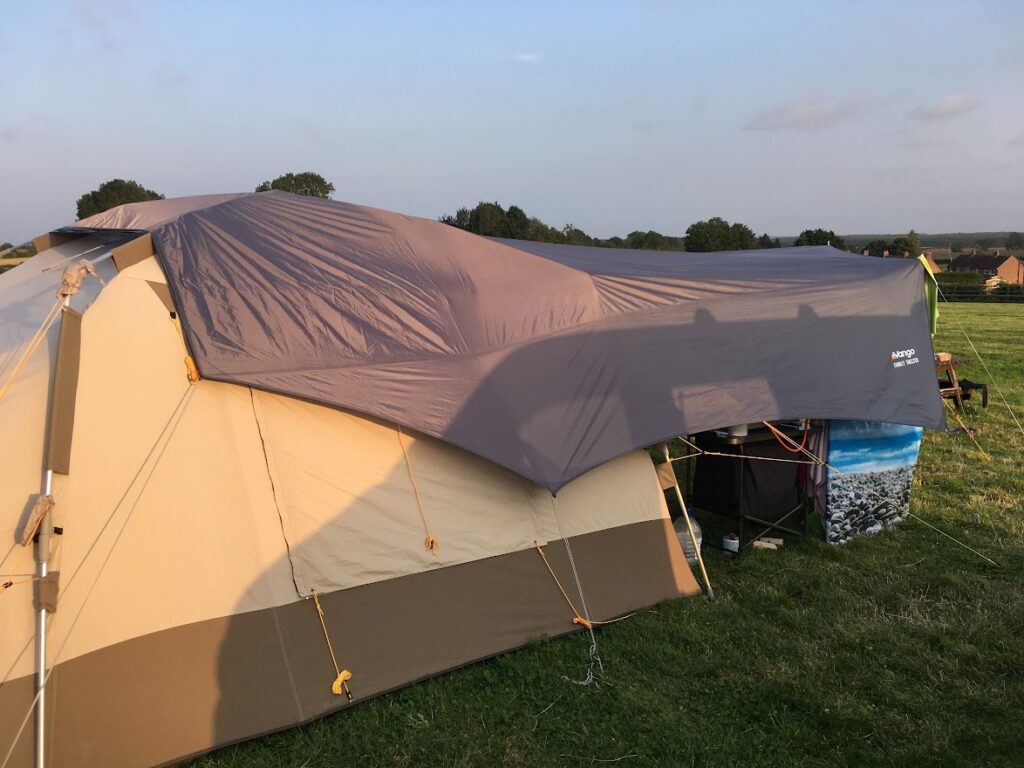
At 6.1 metres in length and 4.95 metres in length your envelope calculations may have you thinking it will double the capacity of your useable space. However to create some form of stability and to stop it sagging in the middle you need to place a fair portion of this over your tent. Initially I placed around 2 metres over the top of the tent with approx. 4 sitting out the front. However even by putting the tarp under extreme tension and placing the supplied King Pole at its max height of 2.2m I still found that it wanted to sag down in the middle meaning you couldn’t stand up underneath it and if it rained I would be asking for trouble.
What About the Waterproof Rating?
So this shelter has a 3000mm hydrostatic head which is probably the same as your tent (budget tents start at around 2000mm and luxury up to 5000mm) and so should have no problems keeping the rain off. The main issue you will have with bad weather is any slumping in the tarp which then encourages rain water to pool. With such a wide expanse of material its very difficult to stop so I don’t think I would recommend taking this for a wet weekend unless you are always on hand to drain pools before they get to a decent size. Alternatively I would abandon fixing the shelter against your tent but place it alongside using two king poles to create a traditional A frame which water will run straight off. The biggest concern of water pooling, aside from getting an early morning shower upon exiting your tent, is the potential for it to strain and tear the seams. As this is nylon it is nigh on impossible to successfully repair a seam once its started to tear.
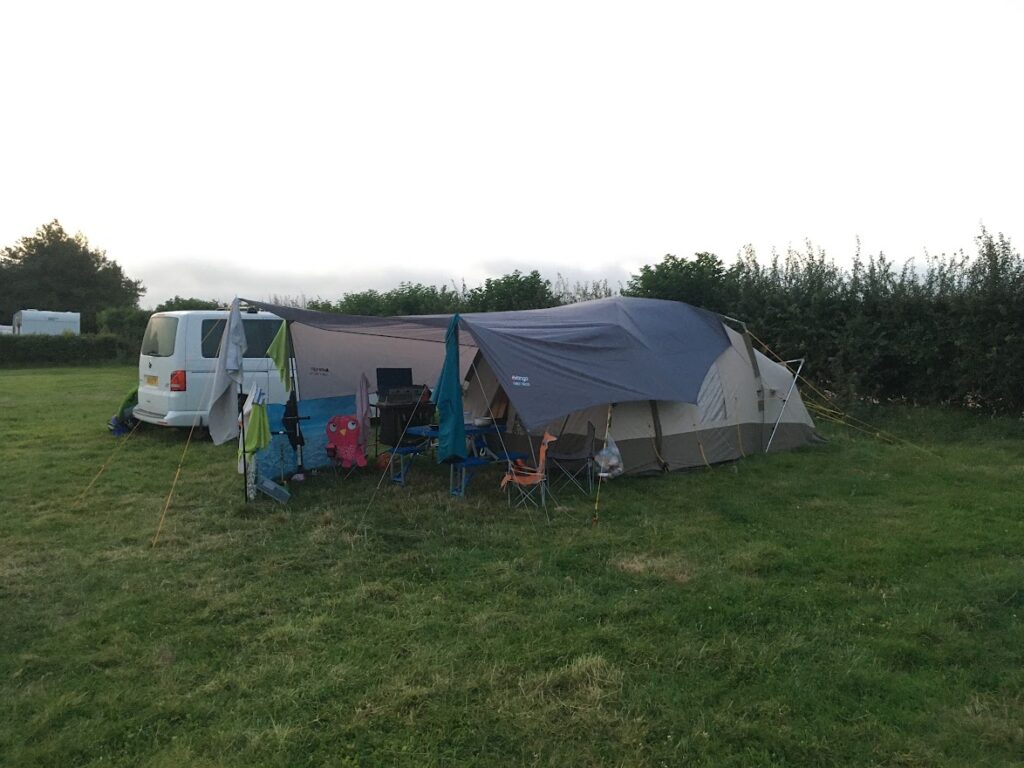
Test 1 – Kyham Cotton Tent
How to Secure the Tarp
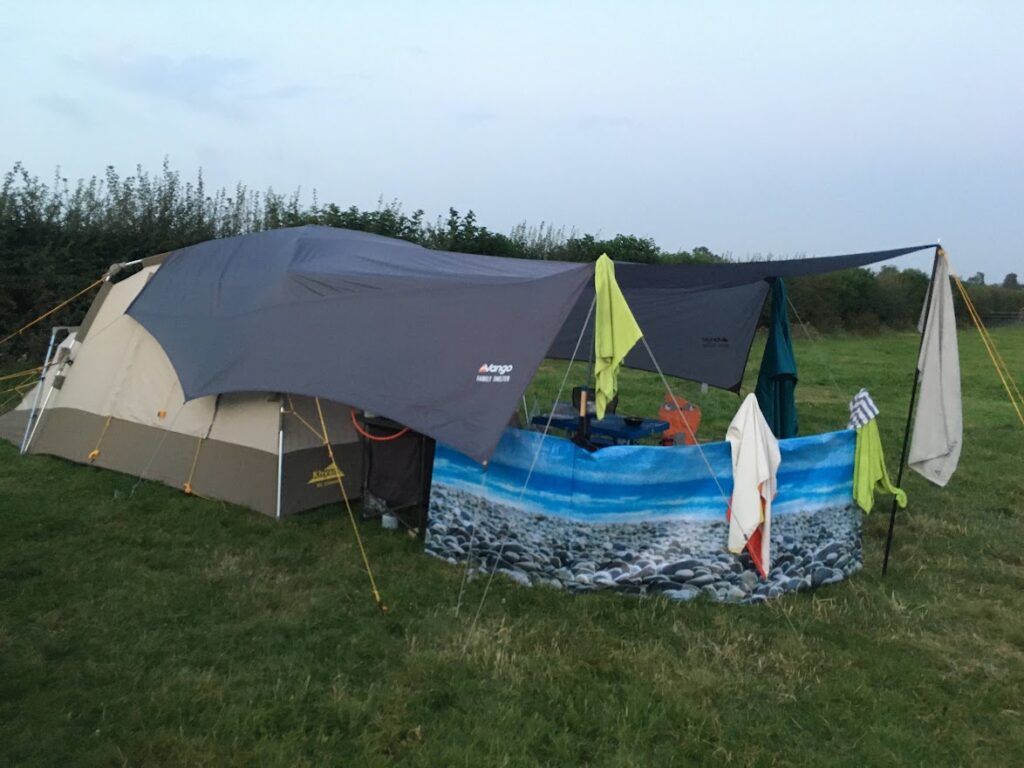
So after much messing around I found that 3m sitting over my tent seemed to create the right amount of frontage which gave me room to place our camp kitchen and chairs. What about the wasted 3m over the tent I hear you cry? Well it actually provides three advantages – it provides extra weather protection over my older tent, reduced the heat on sunny days by providing shade and made it darker in the mornings to sleep.
I also managed to create more useable space under it by adding two more King Poles left and right of the centre one – additional fixed eyelets are provided for this on the tarp. To give me more options on tensioning it properly I also attached two guylines to each pole attachment point ( I had some spares from my main tent but you can easily buy these from a camping shop. By pegging them down at 45 degree to each other I was able to really tension all parts of the tarp. It also meant the edges of the tarp could come down quite sharply which gave some privacy when sitting outside.
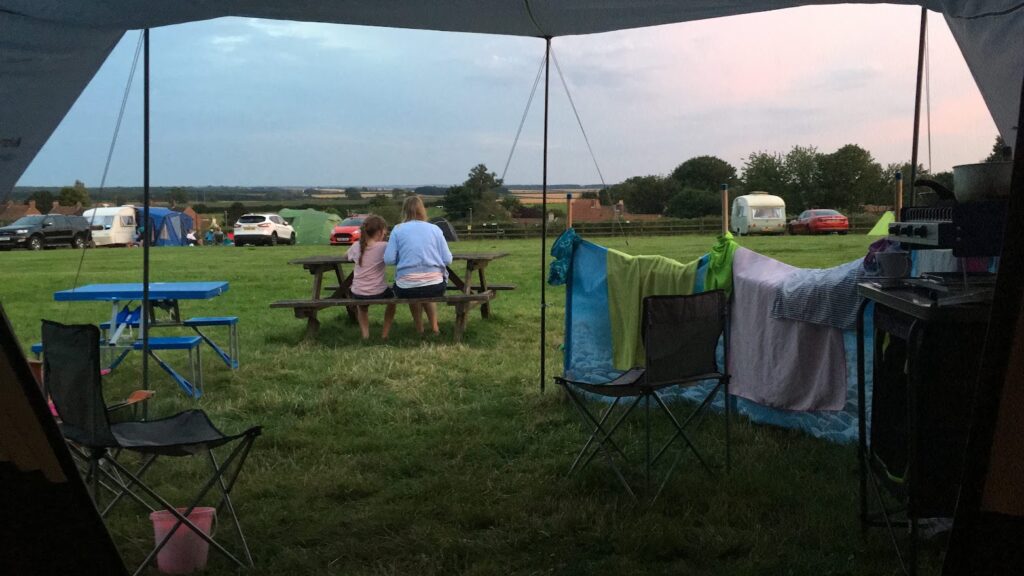
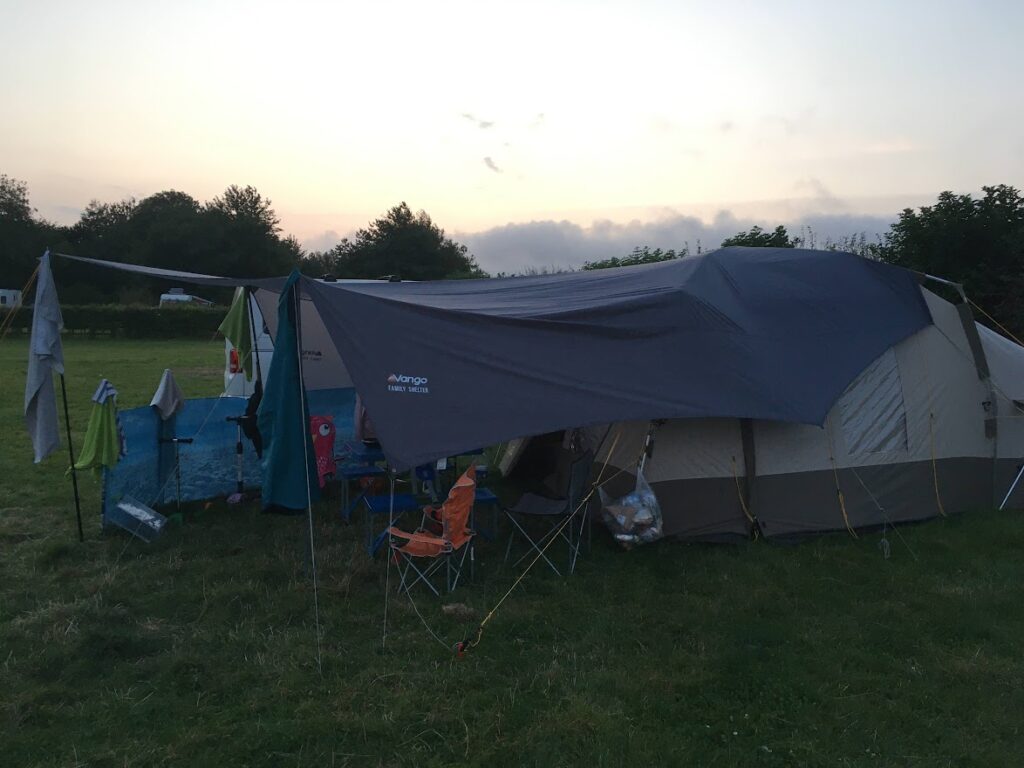
Creating More Outdoor Space
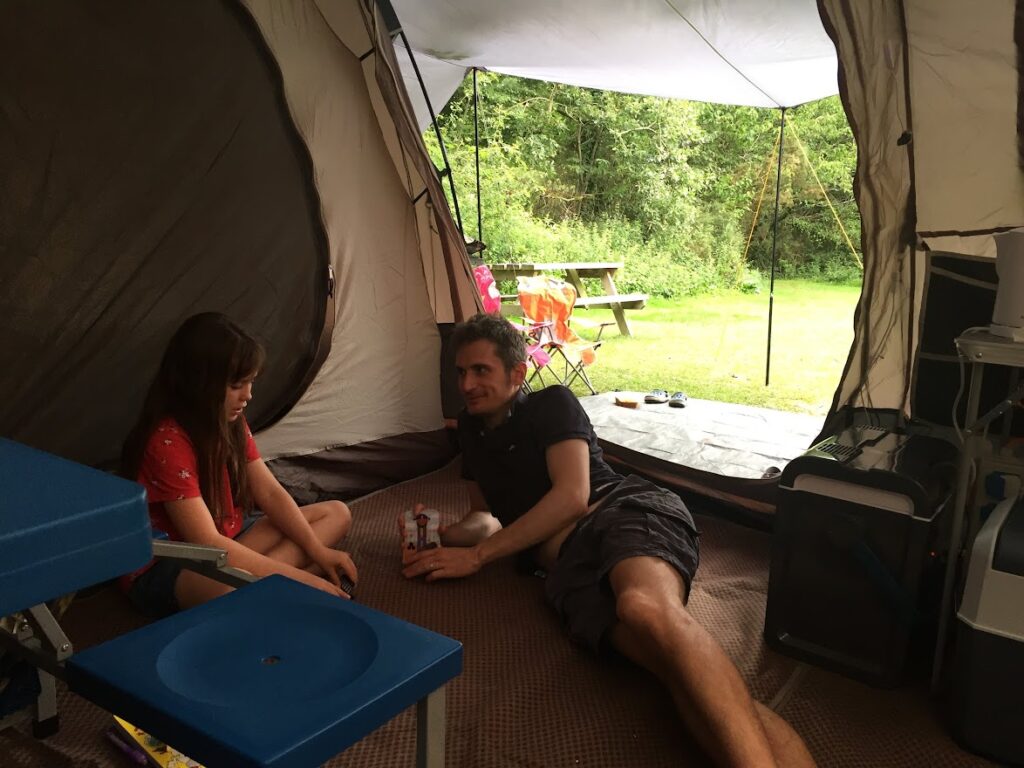
Adding a wind shelter to the front and sides gave even more privacy and kept it a bit warmer and more suitable for using the gas cooker. What was great was that it felt like our own space whilst still sitting outdoors. A more permanent annex would have felt restrictive in the warm weather and have warmed up quickly. We managed to make space for our camp kitchen, 4 folding chairs and also our folding picnic table. It was great heading out for the day and being able to leave this things ‘outside’ without worrying that an unplanned downpour would make them unusable.
Is it Stable Enough?
So a few hours into erecting my Family Shelter the wind started to pick up. I’ve got to say I started to get a bit nervous. Even though I had it fully tensioned and secured the wind did get under it and it started to flap a bit. Unlike a fixed annexe or extension it didn’t have the added benefit of fibreglass poles and multiple ground fixing points. Essentially it was a 3 metre sail suspended up off the ground! However even though I kept checking the seams it happily just flapped along in the evening breeze and last the whole weekend without any issues although I had to re-tension some of the guylines as the flapping starts to work them loose over time.
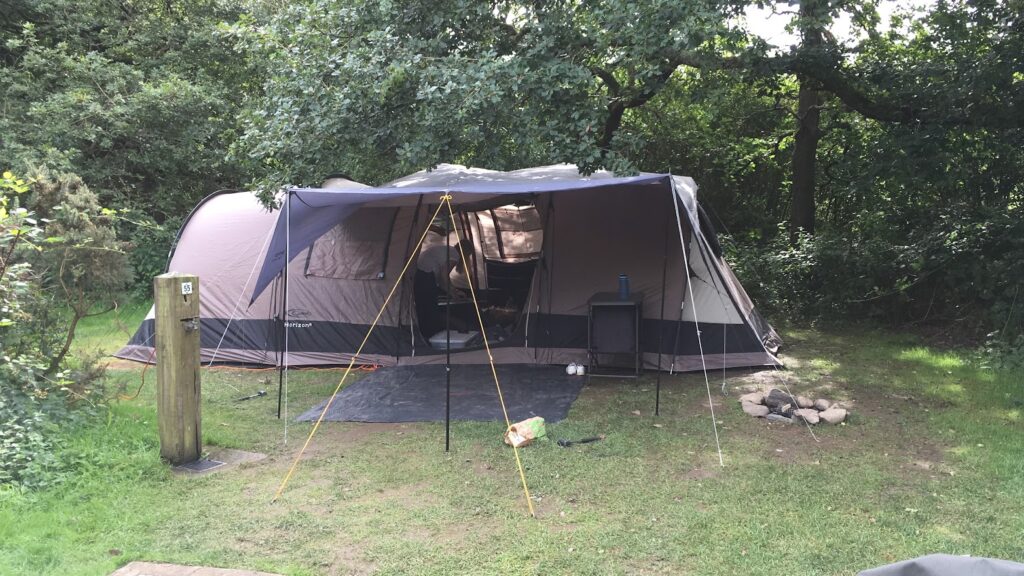
Test 2 – Gelert Horizon 8 Side Attachment
For my second test of the Family Shelter I decided to use it on the side of a Gelert Horizon 8 tunnel tent in replacement of the matching annexe I already owned. We liked the more open feel of the tarp and so got to work fixing it over the Horizon 8. I used the same setup with 3 poles and multiple guylines to tension properly. Again it went up no problems and we could fit the same gear underneath. As out pitch was down in a valley in the woods we thought we wouldn’t have any wind issues.
Along Same the Storm
Anyway along came day 3 and storm Ellen….. We were woken at 1am by the tarp flapping so hard it had blown the camp kitchen over. Out I scampered with more pegs slipping on the mud as I went. It had become one of those classic moments when you think maybe you should have bothered using all the guylines! As hard as I could knock the tent pegs in, the sodden ground was letting them slip back out again. Thankfully as I danced around like a fool the kids slept soundly like nothing was happening. Anyway Tarp wise once I re-tensioned everything it held up well. I sat under it and watched the rain hammer down and the trees sway back and forth. I have to be honest 20 minutes later I bottled it – It wasn’t that the tarp was breaking apart but more I could see the endless battering was slowly working it loose. I really didn’t want to have to get back up a few hours later and rescue it from a tree so decided to take it down. However later inspection revealed no damage had been done.
Conclusion
At around £90 the family shelter adds a lot of space for the money. It’s certainly much cheaper than buying a bigger tent! I would certainly invest in a couple of extra poles if you don’t have them in your kit already. Putting it up can be a bit challenging so I would recommend practising at home so you can adjust guy ropes lengths and work out how you will attach it to your existing tent (with mine you just tension the back guylines over it). Taking a look at the weather while you are away is a good idea and make sure that if you have to take it down you’ll still have enough space for everything. Packing away was no problem and it easily went back into the storage bag supplied so there will be no stresses at the end of the camp unless you need somewhere to hang it to dry!